Tuesday, November 25, 2014

Thanksgiving Tablescape

It is Thanksgiving Eve!  The bird is slowly thawing, the groceries have been purchased, the table is set and the house is shiny & clean, finally it is time to start baking.  All of these preparations make me wonder if the Pilgrims and Indians made such a fuss over their feast?  I pray that all of your Thanksgiving celebrations will be simply blessed and that you'll be surrounded by loved ones. 
In place of a table runner I used three mirrors & since the table is so long I made 3 center pieces with varying heights, textures, and coordinating colors.   
   The only item purchased for this table setting was this bouquet of fresh flowers from Costco.
Autumn colors pop against the black and white tablecloth and dishes.  
Candied fruits add color to each table setting.  The monogrammed napkins were made by my parents and they look so pretty with our Lenox china.
 Psalm 95:1-3
      Oh come, let us sing to the Lord;

    let us make a joyful noise to the rock of our salvation!
Let us come into his presence with thanksgiving;
    let us make a joyful noise to him with songs of praise!
For the Lord is a great God,

    and a great King above all gods.


Happy Thanksgiving!

Tuesday, November 18, 2014

Color on the Ceiling


Our kitchen is neutral.  It is creamy and taupe and classically safe in every aspect.  I like it that way, but when our ceiling needed to be painted due to a leaky shower, I decided to get creative and splash some color up above.  I chose Sherwin William's Festoon Aqua SW 0019.


As a first time ceiling painter I taped the edges and primed the surface before splashing on the color.  Below you can see the first few exciting and nerve racking strokes.  I was thinking I am either going to love this or hate this and at this point I could not tell you which way it would go!  

    
Before - You can see the water damage near the chandelier.
After - Shows how the warm aqua color warms up the room.


The aqua color was inspired by a hint of it in the curtains as well as some pretty accessories that I have been collecting 


I plan to add aqua to the back of the glass front cabinet and I am still deciding whether to splash the walls on each side of the windows with aqua.  Thoughts?


Adding color to the ceiling has added warmth.  It does not make the room feel dark or closed in.  One of my daughter's have requested that I add some clouds and a sunshine as it looks like the sky.  Come on over for a cup of coffee. Pictures don't capture the exact color or excitement that this adds to the space. 


Thursday, March 20, 2014

Matting Artwork

Happy first day of Spring!  This painting was a souvenir from a trip to Punta Cana, Dominican Republic.  It reminds me of warmth and sunshine.  Just what we need for the first day of SPRING!  I brought it back upstairs today (it winters in the basement during the off season).


Have you ever paid to have a photo or artwork custom matted and framed?  It is unbelievably expensive!  Two years ago my husband surprised me with two Renoir Etchings!  They are absolutely beautiful.  He said he spent more on the framing and matting than on the authentic Etchings!  I personally have not paid to have anything framed and matted, I have always done it myself.  It may not be as fancy and I don't have the equipment to bevel the edge of the matting, but I am okay with that!  My wallet is more full because I do it myself.

Today I am working on a quick and inexpensive project to restore these two framed watercolor/pen & ink prints from the thrift store:


One of the prints had water damage in the corner and they were wrinkled and washed out and a little faded looking, but I knew I could spruce them up.


  1. I disassembled the frames & washed the filthy glass really well on both sides so the art can be seen.
  2. Then I ironed the prints.  Yes, I literally ironed the paper between sheets of paper towel so I didn't burn them.  It worked well to flatten them.
  3. Finally I cut a double mat which covers up the water stain in the corner & brings out the colors in the art.
To cut mat board I use a metal ruler, exacto blade and a cutting mat. Starting with a rectangle the exact size as the artwork I decide on the width of the mat I would like.  This is a valuable skill I am thankful I learned in college. Matting artwork and all things rubber cement - Haha!  


Using a pencil I mark off a rectangle.  In this case, the tan mat board was cut to 1" wide and the red to 1-1/4" wide to reveal a 1/4" detail.


The tan looks nice around the artwork, but I think adding a color detail makes the pictures pop!


Someday I plan to visit Venice, Italy, but until then I can dream about it as I enjoy these beauties on my bedroom wall.  This entire project cost less than $12.00.  The framed art cost $5.99 each and I already had the mat board in my stash.  I'll update this post when when I hang them.  I am still debating between two spots - on red walls or cream color?  Either way they will go in our master bedroom.


Do you have photos or artwork that you would like framed/matted?  I would be happy to help!  


Although the first day of Spring didn't get warmer than 30* in Michigan and the snow flurries were still flying, it didn't stop us from enjoying free ice cream cones at Dairy Queen!

 Cheers to much warmer days ahead!


Wednesday, March 19, 2014

Simple Coat Rack and Gallery Wall


Coat Rack/Art Gallery

A mudroom/laundry room can never have enough hooks and storage.  With kids even if there are lots of hooks they often always throw their coats and backpacks on the floor.  My fingers crossed, wishful remedy - a cute coat rack that is hung within their reach.


Before/After:

Primed wall, applied pre-pasted, paintable bead board wallpaper (from Lowes):

Added a wide trim piece and small ledge.  Details were added with a router & the trim and wallpaper were painted with the same color as the existing doors and trim in the laundry room (Behr primer/paint Ivory Beige color):


Finally my favorite detail was added!  Aren't these dragonfly hooks adorable?! They were purchased a few years ago on final clearance at Target.  They were marked down to a few dollars and I knew they would come in handy someday.


Since the bead board wallpaper went up so easily and looked realistic I decided to try applying it to the cabinet fronts.  It was so quick and easy and I am thrilled with the results!


Cabinet Before/After:


Gallery Wall

The hooks have proved functional and after several months I have finally tackled the blank wall space above. The combination of framed family pictures and children's artwork combine perfectly in this space.  The vertical interest makes this small room feel larger.  


This gallery wall cost $25 for the Lifestyle frames from Michael's (including the matting) and $10 for the picture printing (Costco).  I already had two 11 x 14 frames and the oval frame.  I love the layered look of the oval frame overlapping the 11 x 14 frames.  It makes for an interesting focal point!


Artist Credit:  The large watercolor painting on the left was created by Olivia when she was 3 years old.  The colorful tissue paper collages were made by Addison and Amelia when they were 3 years old.  

Photography Credit:  Family Photos by Vanessa Saven Photography 2014

Construction Execution:  Huge THANK YOU to my Dad who perfectly executed my vision on this project!  He made the shelf/coat rack for me.  

Here is a look back at this room when I began beautifying it.  Click here.  


Tuesday, March 18, 2014

Preparing for Spring Gardening

After enduring the harshest winter of my lifetime I am more than ready for Spring.  A few weeks ago I started preparing for the upcoming gardening season.

(1)  Picked up this vintage blue watering can planter from the thrift store.  I cannot wait to fill this with beautiful flowers.  Hardest decision will be figuring out if it belongs on the front porch or back porch!


(2)  Started saving used coffee grounds in a container.  Usually we add the filter and all to the compost bin, but I like to sprinkle the coffee grounds around my hydrangeas:  


Last year the coffee grounds changed the PH of the soil around the Hydrangeas and turned the flowers from light pink to a gorgeous blue/purple.The plants were also healthier than ever before:


(3) Saving eggshells which will add calcium to the soil and also deter slugs and Japanese beetles.  I have been rinsing out the egg shells and keeping them in a closed container.


I plan to use the coffee bean grinder to make a course powder of the eggshells. They will be sprinkled around Hosta plants to keep slugs away and at the base of roses for the calcium.  I have also read that if you have a Japanese beetle infestation that you can sprinkle it right onto the critter and it will kill it.  Last year a pesticide worked to get them off of my knockout roses, but if this organic method works I will be happy.


(4) Save your large plastic produce containers.  Any size will do, but I like these super sized ones.  I use these to start seedlings.  They have built in drainage and become a miniature green house.  I line the bottom of each container with coffee filters and then add quality potting soil and seeds.  I use a Sharpie marker to label the type of plant and sun conditions on the lid. Once they are all planted I put a board across my kids wagon and roll them into the sun during warm days.  Be sure to take the lids off in the sun or your plants may fry up!  During chilly nights I close up the lids, roll them into the garage and cover them with a thick blanket.


(5) Lastly, do your best to protect your plants from hungry deer. Last year the deer were quick to devour my hyacinth, tulips, hostas, and sedum. This year I will be ready and will spray my plants before it is too late.  I use a large spray bottle (approx. 1/2 gallon size) filled with water and a Tablespoon of Murphy's Oil Soap shaken in.  Simply spray your yummiest plants and the deer will hopefully dislike the flavor and leave them alone.  Respray after it rains.


(6) As I wait for the snow to melt and for gardening season to begin I am staying busy by designing gardens as well as working on projects inside our home.  Stop back soon to see the fun I've been having!  Happy prepping.


Wednesday, February 12, 2014

Dodging Potholes

In Michigan people joke that there are two seasons:  Winter and Road Construction.  If winter ever evacuates, the road crews have job security to say the least.  While navigating the tire-wreaking moguls to pick up my daughters from school I thought about how metaphoric these roads are to life.  We drive down pathways wanting to go at our own pace hoping no one or nothing gets in our way.  Just down the road we may need to pull over to change a tire or suddenly stop for any number of interruptions.  No one knows what the future holds.  Thank God for Faith and Roadside Assistance (I have not needed the latter yet, thankfully)! 


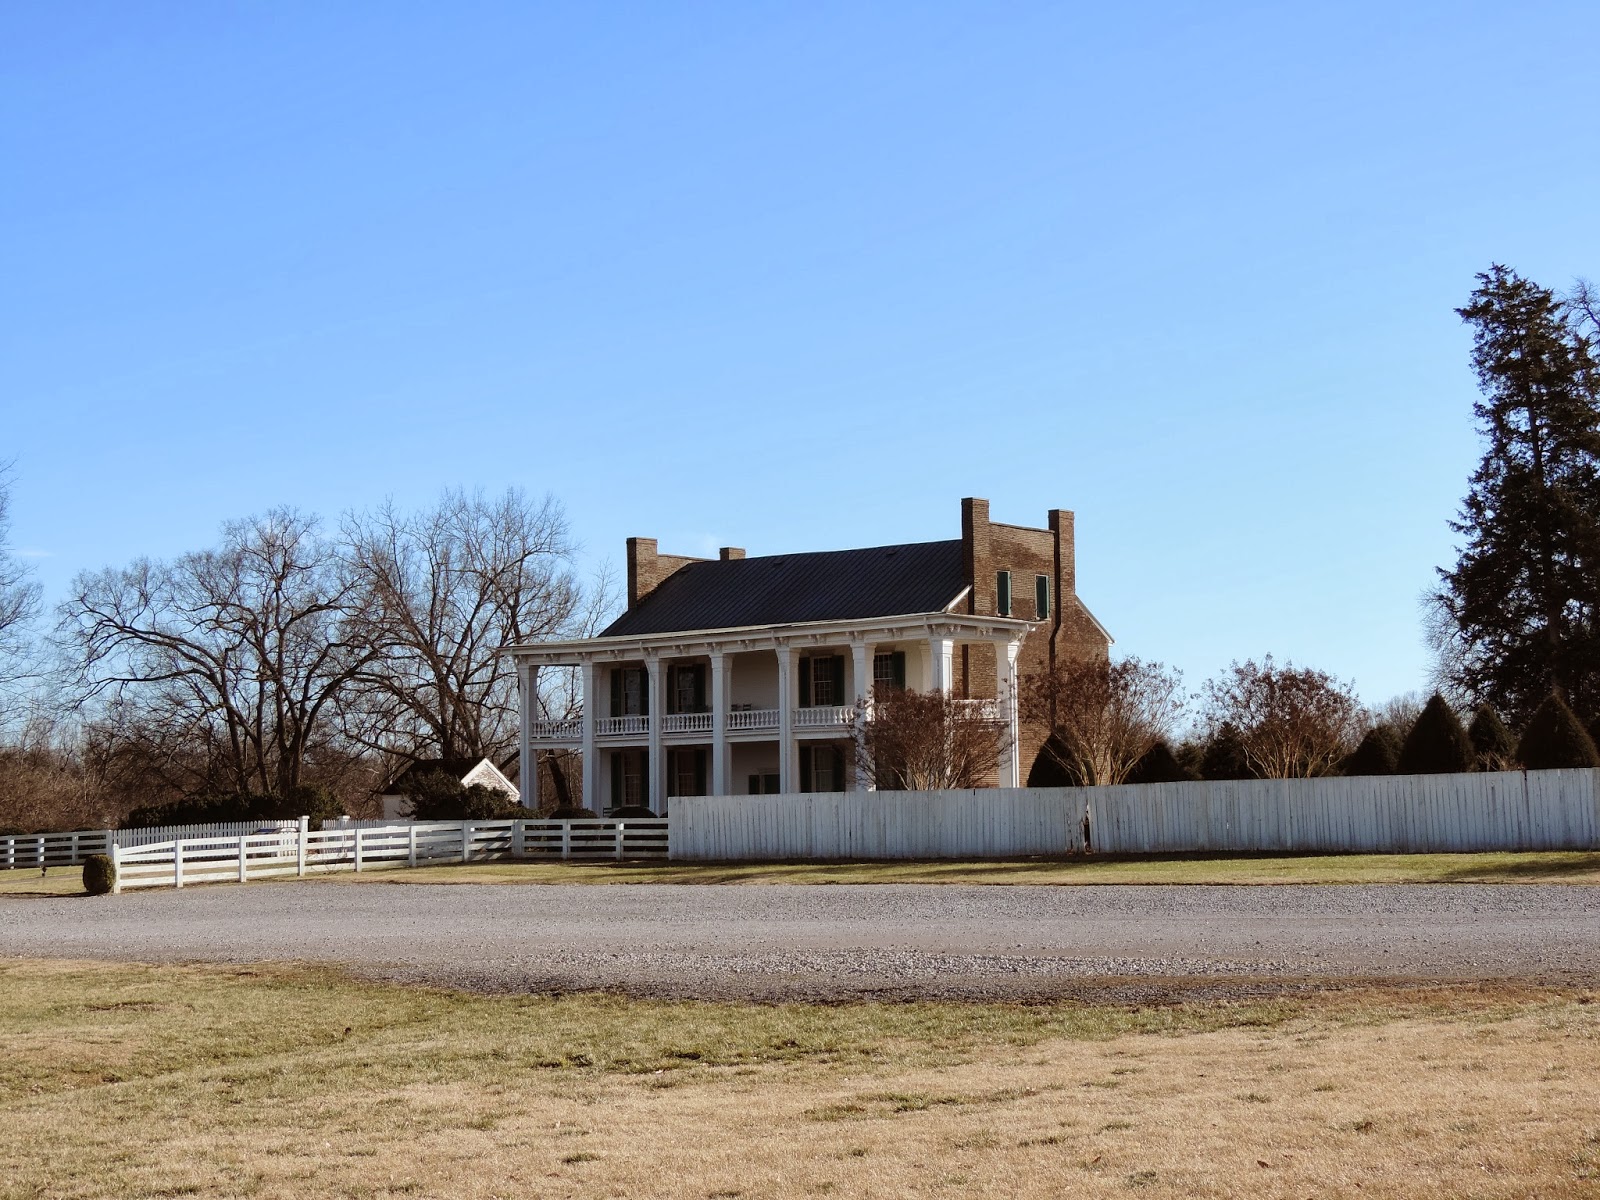
Speaking of unexpectedness, I just finished reading the novel "Widow of the South" by Robert Hicks.  Typically I am not an avid reader and I have never been interested in reading about the gory details of the Civil War.  However, while we were vacationing in Tennessee a few weeks ago we took a wrong turn on our way to downtown Franklin and we stumbled upon the Carnton Plantation.  A beautiful Antebellum plantation.  I was curious to see the beautiful architecture and decorations inside, so we took a guided tour.  This hour long tour changed me.  It painted a picture of the Civil War that I have never before been able to imagine or grasp the details of.


This gorgeous home was the plantation of John and Carrie McGavock.  They were very wealthy and on November 30, 1864 the bloodiest five hours of the Civil War were fought on their land and their lovely home became a field hospital where they performed amputations and procedures in an attempt to spare lives.  The lady of the house, Carrie teamed up with two doctors. She cut up her fancy linens to make bandages, served food and drinks, and most importantly calmed the boys in a motherly fashion.  Every room in her house was full of injured Confederate soldiers and there were nearly 9,500 Confederate and Union soldiers dead outside.  The floors are still stained with blood today, 150 years later, which is incredibly heartbreaking to see. 


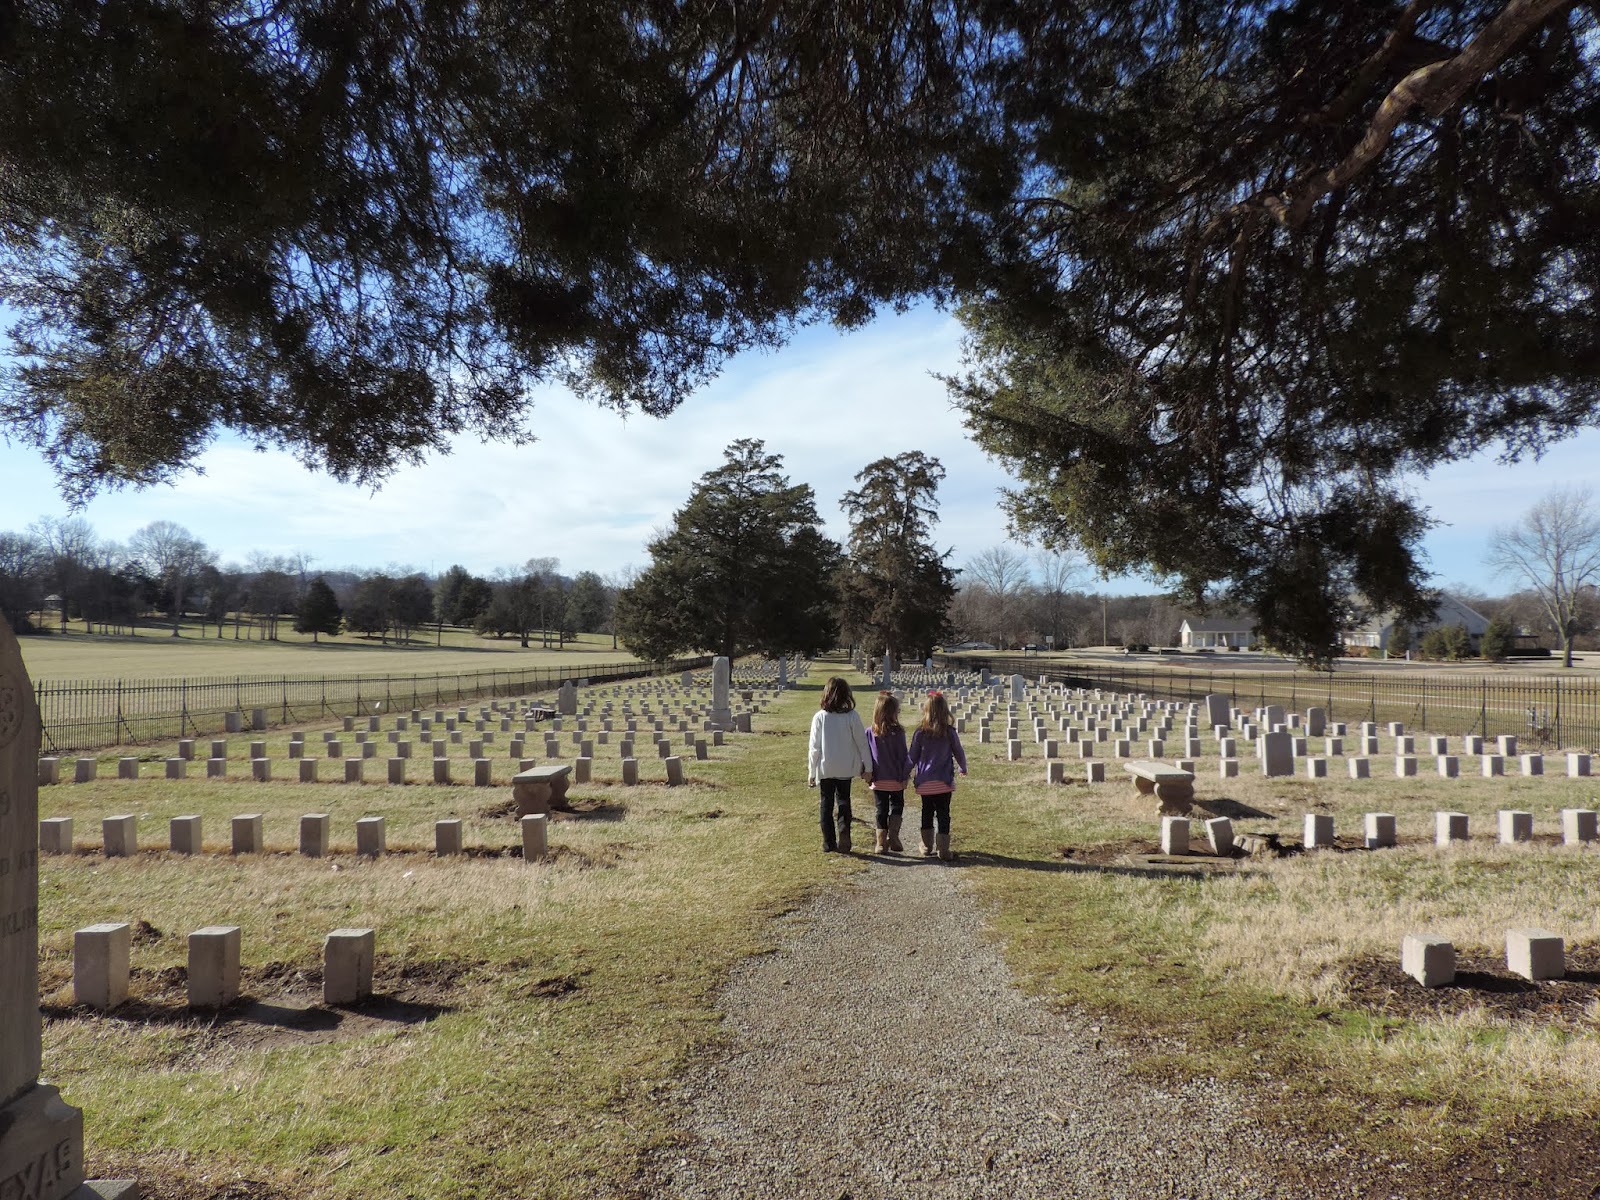
The McGavock's created a 2 acre cemetery on their land and buried 1,500 Confederate soldiers.  Maintaining the cemetery and communicating with the families of the fallen boys became Carrie's lifelong philanthropy.  Imagine if Carrie had "dodged the pothole" and told the General to lead his men elsewhere?  This battle changed the lives of this family and everyone who was involved.  For me, walking through this historic battlefield, cemetery, and home made it seem like 150 years was not so long ago.  This was an eye opening and very real experience for me to see, hear, and read about the details of this Battle of Franklin.


In Michigan as we continue to dodge potholes and move forward through the final weeks of a record-breaking, brutally cold and snowy winter, I look forward to warm sunshine, Spring blossoms, and smoother roads.  Tomorrow is never promised, but we must take comfort in the hope that we will navigate through the potholes being stronger on the other side.  Carrie McGavock to me is a symbol of bravery and compassion even throughout her darkest days and I felt compelled to share her story of strength and courage with you.


For more information visit the Carnton Plantation website